Conservation Science
What Is the Role of Science in Conservation?
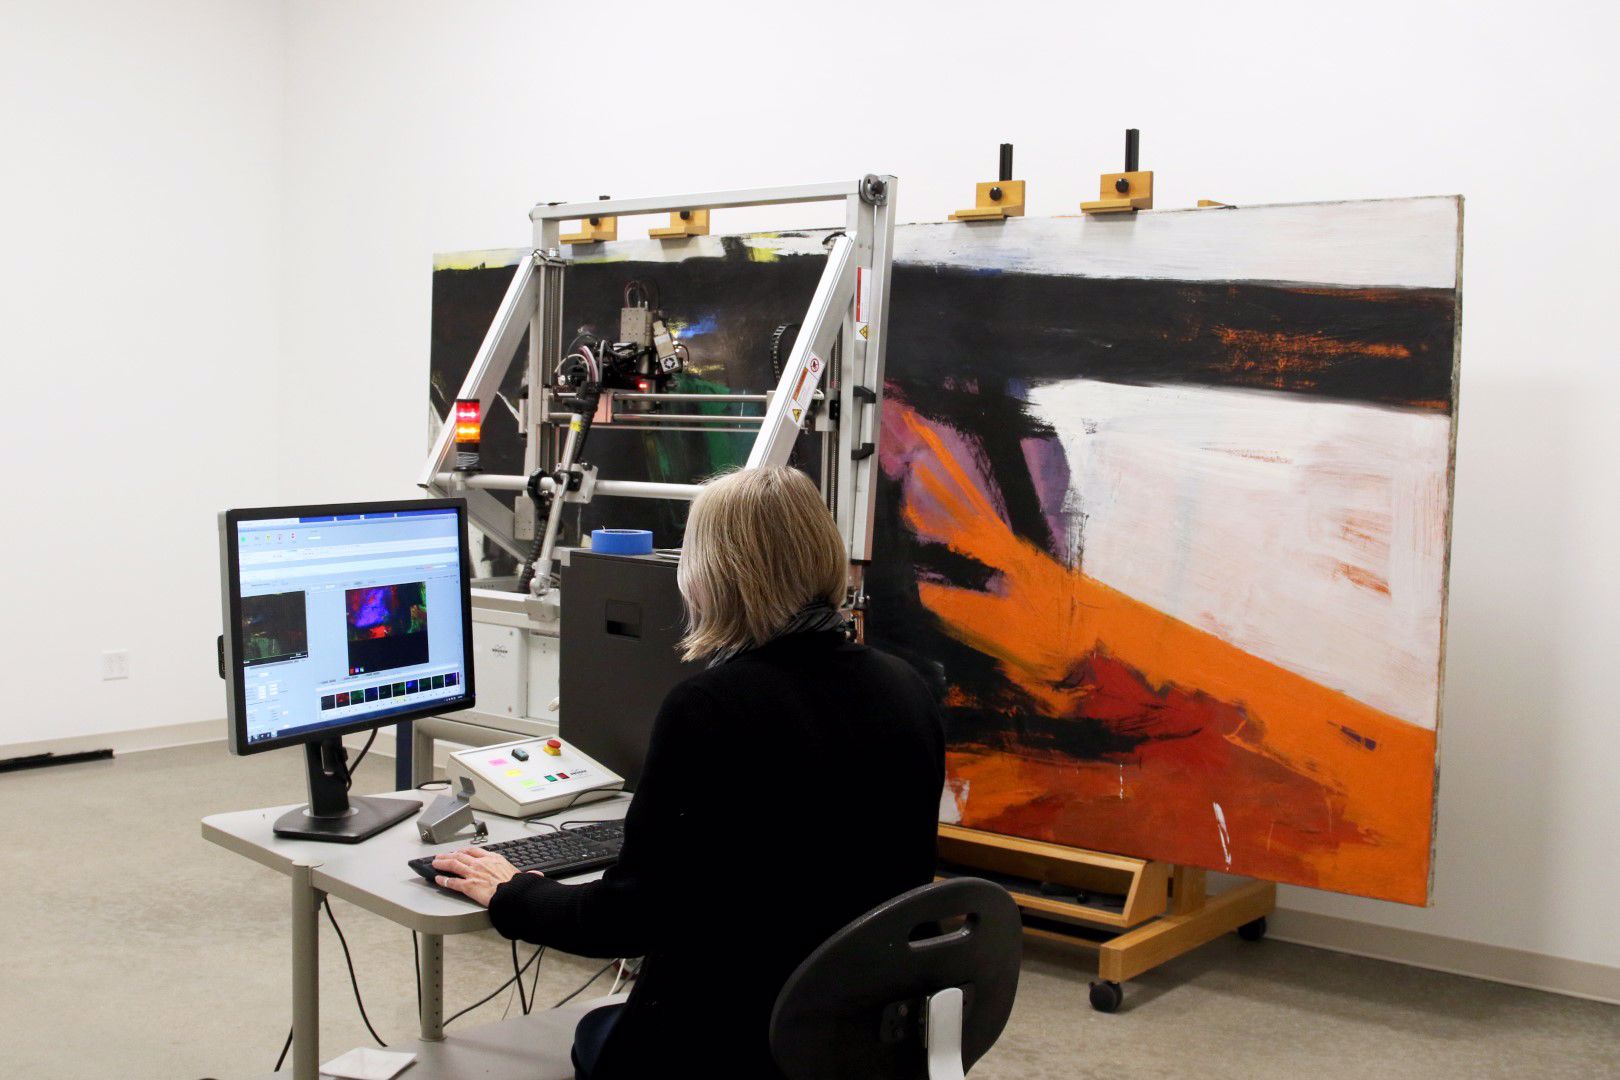
In this example of conservation science in action, non-destructive x-ray fluorescence spectroscopy is used to create elemental maps showing the distribution of pigments.
Franz Kline, Orange and Black Wall, 1959, oil on canvas, the Museum of Fine Arts, Houston, bequest of Caroline Wiess Law.
Conservation science uses scientific techniques to help conservators and art historians better understand cultural heritage objects.
The findings can help to:
• characterize the chemical, biological, and physical properties of cultural materials to understand how an object was made or how an artist worked
• elucidate deterioration processes that objects are vulnerable to
• advise conservators on appropriate treatment materials or techniques
• help to develop new materials and treatment approaches
• develop new analytical techniques or tools
Conservation Science & Technical Art History

Installation view of Hidden Layers: Painting and Process in Europe, 1500–1800
Installation view of Hidden Layers: Painting and Process in Europe, 1500–1800
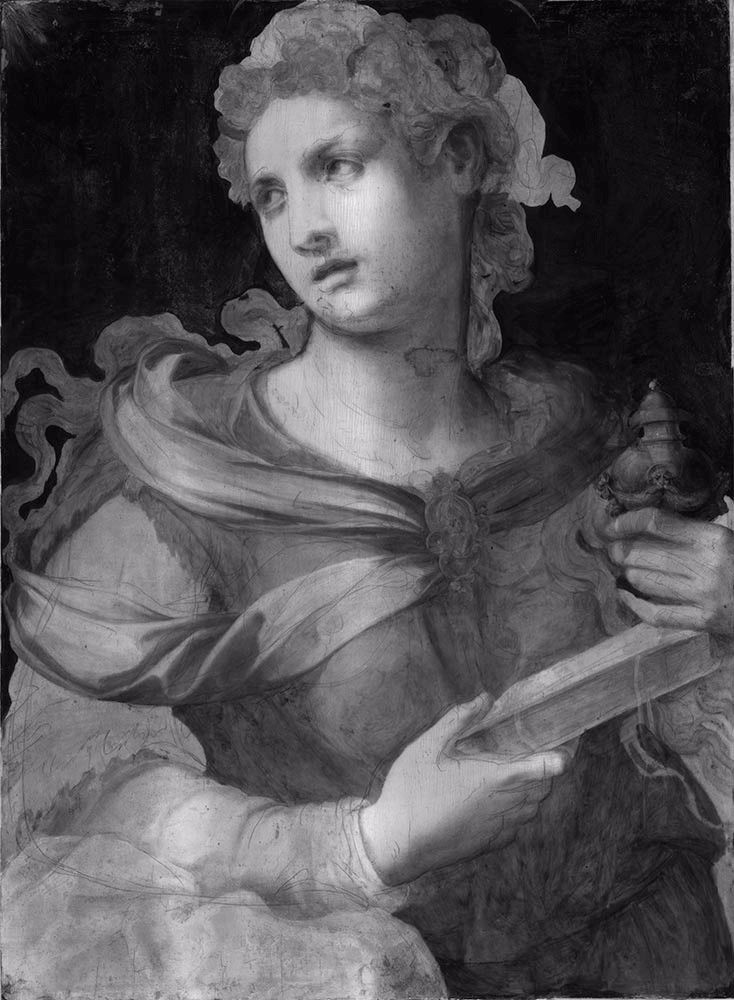
Michele Tosini, Saint Mary Magdalene, 1560s, oil on wood, the Museum of Fine Arts, Houston, the Samuel H. Kress Collection.
This infrared reflectogram of Michele Tosini’s Saint Mary Magdalene shows the artist’s expressive underdrawing, particularly visible in the folds of the garment.
Recent scientific advances have given rise to a new discipline in the field of art history: technical art history. Technical art history is a multidisciplinary field that seeks to better understand a given artist’s intentions, decision processes, techniques, and materials through careful examination of their works via scientific analysis and technical imaging. The findings are contextualized by scientists, conservators, and art historians, resulting in a deeper understanding of an object.
David Bomford, chair emeritus of the MFAH conservation department, characterized the field in the 1998 book Looking through Paintings, saying that technical art history “underwrites everything. It travels in a great sweep from the general to the particular: from global sources of pigment supply to the specifics of extracting dyestuffs in 17th-century Holland, from medieval concepts of colour to vivid glimpses in London studios. It is impossible to understand art properly without its insights. It acknowledges—celebrates—the artist at work and the act of making.”
Technical art history projects at the MFAH include research into Franz Kline, Dorothy Antoinette (Toni) LaSelle, Amadeo Modigliani, Hélio Oiticica, and Alfredo Volpi among others. Findings from the conservation department were featured in the exhibition Hidden Layers: Paintings and Process in Europe, 1500–1800.
Non-Destructive Examination Techniques

Alfredo Volpi, Bandeiras verdes sobre rosa (Green Flags on Pink), c. 1957, tempera on canvas, the Museum of Fine Arts, Houston, the Adolpho Leirner Collection of Brazilian Constructive Art, Museum purchase funded by the Caroline Wiess Law Accessions Endowment Fund.
Hélio Oiticica, Relevo espacial (Spatial Relief), c. 1960, paint on cut-out wood, the Museum of Fine Arts, Houston, the Adolpho Leirner Collection of Brazilian Constructive Art, museum purchase funded by the Caroline Wiess Law Foundation.
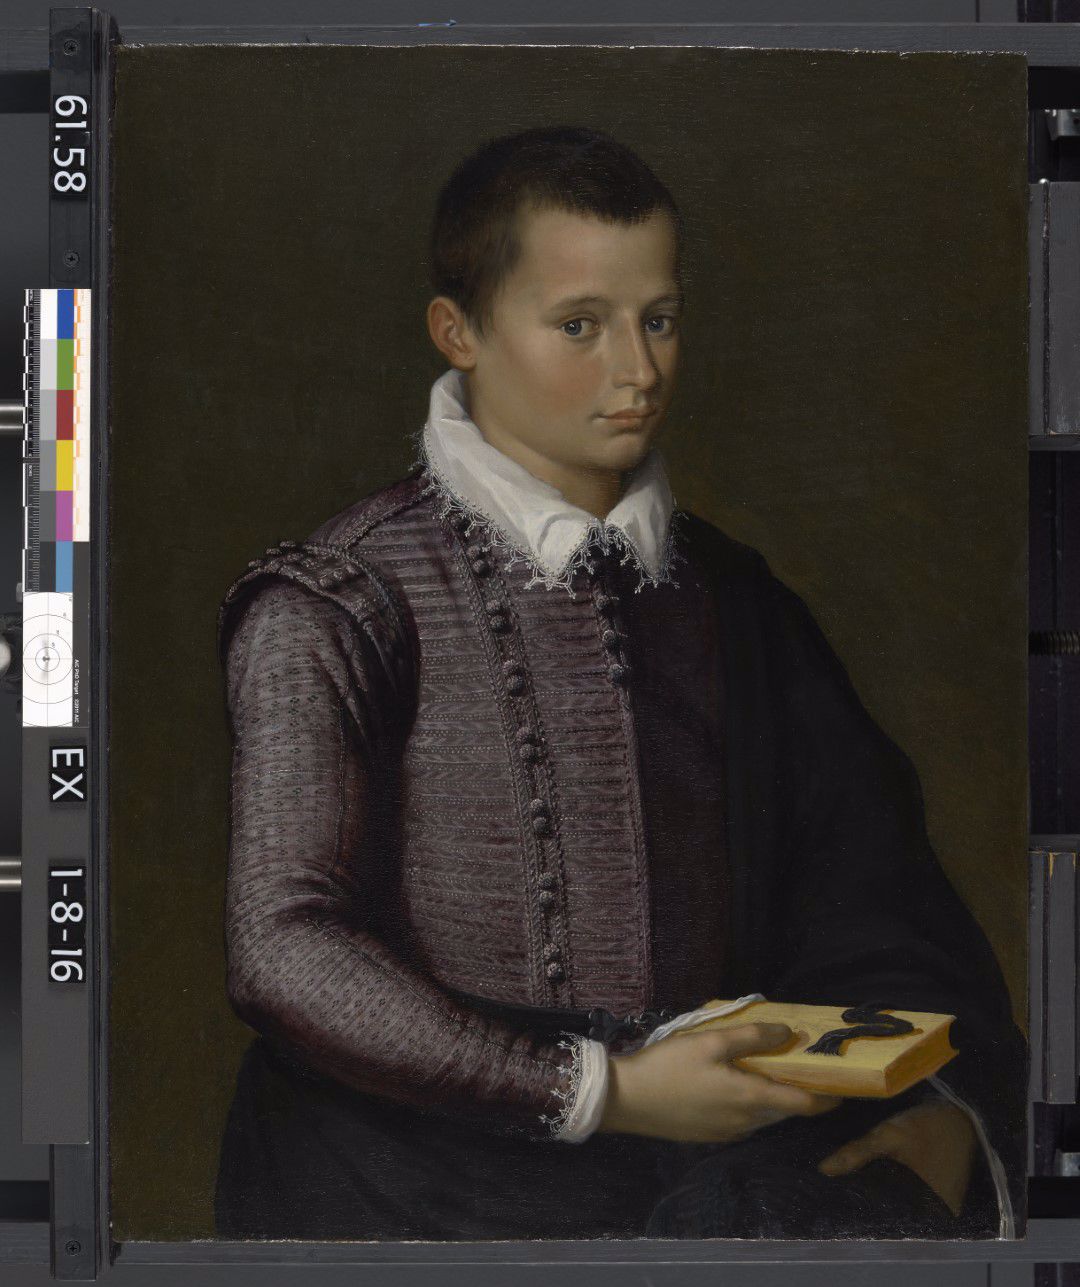
Portrait of a Boy Holding a Book, recto in normal light.
Italian, Portrait of a Boy Holding a Book, 1560s, oil on wood, the Museum of Fine Arts, Houston, the Samuel H. Kress Collection.
Portrait of a Boy Holding a Book, recto, longwave ultraviolet fluorescence.
Italian, Portrait of a Boy Holding a Book, 1560s, oil on wood, the Museum of Fine Arts, Houston, the Samuel H. Kress Collection.
This infrared reflectogram of Portrait of a Boy Holding a Book reveals another portrait underneath. The eyes of the previous subject are especially noticeable.
In this example of conservation science in action, XRF is used to identify gemstones.
Nasta’liq Khanjar (Dagger), 19th century, steel with enamel and jewels, the Museum of Fine Arts, Houston, Museum purchase funded by the Brown Foundation Accessions Endowment Fund.
Conservators and conservation scientists follow a code of ethics that encourages use of non-destructive examination techniques whenever possible.
Visual Examination
A close and careful examination of an object is often very informative. Initially, conservators, art historians, and scientists look at the object under normal lighting conditions. To better see the topography of a work, sometimes they use “raking light.” A light source is placed to one side of an object and the light “rakes” across the surface, highlighting differences in texture.
Microscopes are also commonly used to reveal details that would otherwise be missed by the naked eye. Taken through a microscope, this image of Bandeiras verdes sobre rosa (Green Flags on Pink) by Alfredo Volpi shows he used a pencil to draw the outlines of the flags before painting them. Raking light shows the rich, painterly texture of Relevo especial (Spatial Relief) by Hélio Oiticica (image #2 in slideshow).
Advanced Imaging Techniques
In addition to visible light, conservators may use other forms of radiation to gain information about an object. Light from the ultraviolet (UV) and infrared (IR) portions of the light spectrum are two types of illumination commonly used by conservators.
Ultraviolet illumination induces fluorescence in certain material that can help conservators see the condition of the object’s surface, including the presence or absence of varnishes and areas of overpaint or added material. This technique is called ultraviolet-induced visible fluorescence (UVF) because the fluorescence is visible.
Infrared reflectography (IRR) is useful because it allows the conservators to see through surface layers. Some pigments become transparent under IR illumination, whereas others retain opacity. This technique can help distinguish between pigments as well as reveal information such as the underdrawing of a painting.
Images of the Italian painting Portrait of a Boy Holding a Book (images #3–#5 in slideshow) illustrate normal light, UVF, and IR. The UVF image shows the fluorescence of the varnish and cracks in the paint layer, and the the IR image shows a second set of eyes underneath those of the boy’s, indicating that the artist reused the panel and painted the boy’s portrait over another work.
Examination Using X-rays
X-ray radiography and X-ray fluorescence spectroscopy (XRF) are two examples of examination techniques that require specialized instrumentation to interpret data. X-ray radiography, also used in the medical field, can reveal details of how an object was made, changes in composition, presence of old damages, and some information on material present. XRF provides information on elements present in a work of art, which in turn allows the identification of pigments, types of alloys, etc.
Sampling

Franz Kline, Orange and Black Wall, 1959, oil on canvas, the Museum of Fine Arts, Houston, bequest of Caroline Wiess Law.
Samples are taken because they reveal the stratigraphy of a painting, showing how the artist built up the composition. Some types of analyses require micro-destructive sampling of an object, which is not undertaken lightly. Samples must come from areas of damage and be as small as possible—often microscopic. Sampling sites are carefully documented, and samples are archived for future use.
A sample from Orange and Black Wall by Franz Kline has multiple paint layers revealing multiple changes in color. In some cases the paint layers are cleanly separated, showing the underlying paint layer had dried before the new layer was applied. In other cases the underlying paint layer was still wet, and mixing of the layers occurred, such as in the turquoise and black layers in the middle. This sample reveals that sometimes Kline waited before making changes, and at other times he was less patient.
Samples are also used for other analyses, including infrared and Raman spectroscopy, gas chromatography, mass spectrometry, and scanning electron microscopy—techniques that provide form information about the materials present in the sample.